This is the 3rd part of this series. First two are here:
Top Windows 7 Tips And Tricks ( Part 1 )
Top Windows 7 Tips And Tricks ( Part 2 )
Now coming back to the Windows 7 Tips And Tricks in this part:
- Hide Empty Drives:
If you have empty drives that you want to display grayed out so they can’t be selected in Windows Explorer, click the Start button, enter “folder options” in the Search box, and press Enter, or click the Folder Options link. On the View tab, select the Hide empty drives in the Computer folder check box so there is a check mark in the box.
- Use Check Boxes In Windows Explorer To Select Files:
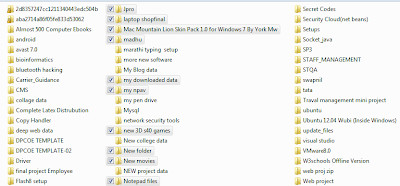
You’re probably used to the standard way of selecting multiple files or folders in Windows Explorer by holding down the Shift key (contiguous selection) or the Ctrl key (not contiguous selection) while clicking on files or folders. However, Windows 7 introduced an easier way of selecting multiple files and folders. You can display a check box next to each file and folder. Clicking the check box next to an item selects that item. You might be familiar with opening "folder option". If not, then read previous article in this series.
- Hide/Disable Your Previous Searches In Windows Explorer:
By default, the Search feature in Windows 7 saves the last three recent searches. If you’re annoyed by this, or you share your computer and don’t want other users to see what you’ve searched for, you can turn this off using the Group Policy Editor.
Note: This method uses Group Policy Editor which is not available in Home versions of Windows 7
Notice that when you go to the search box and start entering in something, the last three searches you’ve done appear. It can get old looking at mistyped words or seeing a search term that is old.
To turn that feature off we need to go into Local Group Policy Editor. Type gpedit.msc into the start search box and hit Enter.
Navigate to User Configuration \ Administrative Templates \ Windows Components \ Windows Explorer then double click on “Turn off display of recent search entries in the Windows Explorer search box”.
- Add Tabs To Windows Explorer In Windows 7:
If you want to open multiple locations at one time in Windows Explorer, you must open multiple windows. If you’re getting tired of dealing with too many separate windows, you easily add tabs to Explorer to easily navigate among different selected locations, like you navigate among different web pages in most of today’s web browsers. The following article discusses a tool, called QTTabBar, that adds tabs to Windows Explorer.
Add Tabbed Browsing To Explorer In Windows 7


No comments:
Post a Comment
Post comments only relevant to the topic. Do not spam. Comment must be meaningful and must add to the conversation. Comments containing more than 1 link will be deleted.